Once you log in to the Site Blazer app, by clicking the Dashboard option, you can use the Auto-Login option for the site you need to add the product.

-
Log In to WordPress Admin
- Navigate to your WordPress admin panel.
-
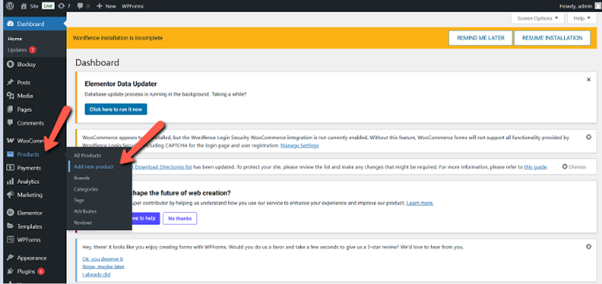
Go to Products
- In the left-hand menu, click on "Products" and then "Add New."
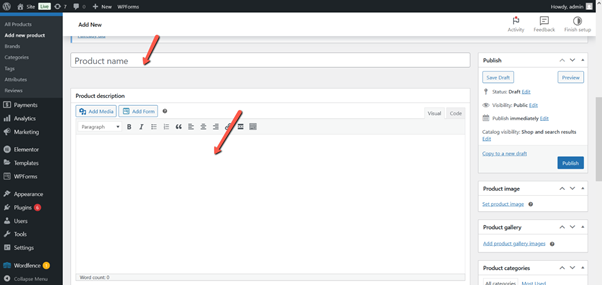
Enter Product Details
- Title: Enter the product name.
- Description: Add a detailed product description in the main editor.
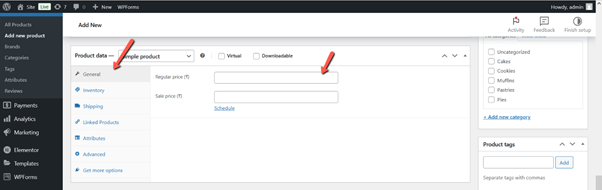
Product Data
1. General
- Regular Price:
- The normal price at which the product will be sold.
- Sale Price:
- An optional discounted price.
- You can also schedule the sale to run during specific dates.
- Tax Settings (if available):
- Choose the tax class (standard, reduced, or zero rate).
2. Inventory
- SKU (Stock Keeping Unit):
- A unique identifier for each product. Helps in tracking inventory.
- Manage Stock (Enable/Disable):
- If enabled, you can enter Stock Quantity.
- The system will automatically reduce stock after each purchase.
- Stock Status:
- In Stock, Out of Stock, or On Backorder.
- Allow Backorders:
- Let customers order even if stock runs out.
3. Shipping
- Weight:
- The product weight is used to calculate shipping costs.
- Dimensions (Length × Width × Height):
- Helps shipping carriers calculate package size and cost.
- Shipping Class:
- Assigns the product to a shipping category (e.g., heavy, fragile).
4. Linked Products
- Upsells:
- Products you recommend instead (usually higher-end).
- Shown on the product page as “You may also like…”.
- Cross-sells:
- Products shown on the cart page to encourage additional purchases.
5. Attributes
- Custom Product Attributes:
- For example: Size (S, M, L) or Color (Red, Blue, Green).
- Used for Variations (for variable products):
- Attributes are required if you want to create product variations.
6. Advanced
- Purchase Note:
- A custom message sent to the customer after purchase (e.g., thank you note or special instructions).
- Menu Order:
- Controls the product’s display order on the front end (lower numbers show first).
- Enable Reviews:
- Allow or disallow customer reviews for this product.
-
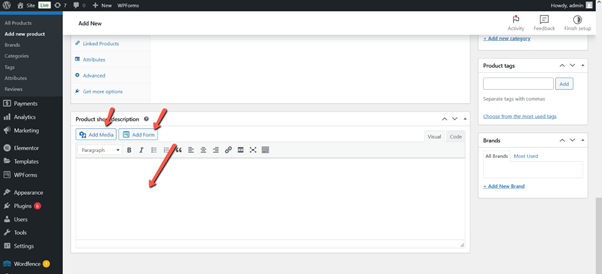
Short Description
- Add a brief description in the "Product short description" box.
-
Product Image
- Set the main product image by clicking "Set product image."
-
Product Gallery
- Add additional images to the product gallery.
Publish
- Click "Publish" to make the product live on your site.