A-Record Pointing Process
Connect Your Domain to SiteBlazer (Easy Guide)
Welcome to SiteBlazer!
This guide will help you connect your domain name (example: yourbusiness.com) to your SiteBlazer website so your site appears when people visit your domain.
Don’t worry — this process is safe and can be changed anytime.
Step 1: Get Your Website IP Address
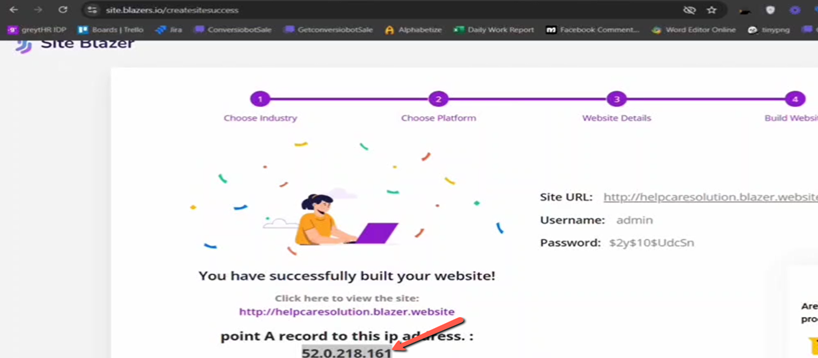
1. After selecting your template, category, and products, SiteBlazer will create your website.
2. You will be redirected to the Website Ready page.
3. On this page, you will see an IP Address (numbers like 123.45.67.89).
4. Copy this IP address — you will need it in the next step.
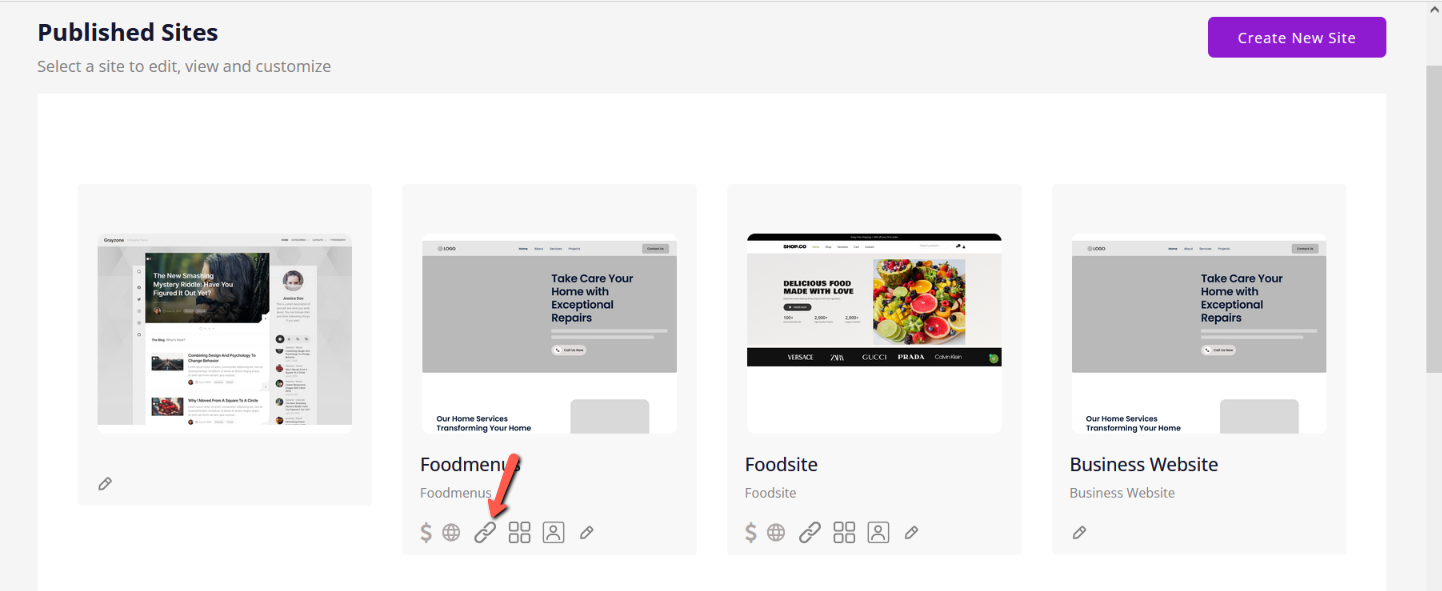
If you miss this step, you can also connect the custom Domain in your SiteBlazer dashboard by clicking the Custom Domain icon.
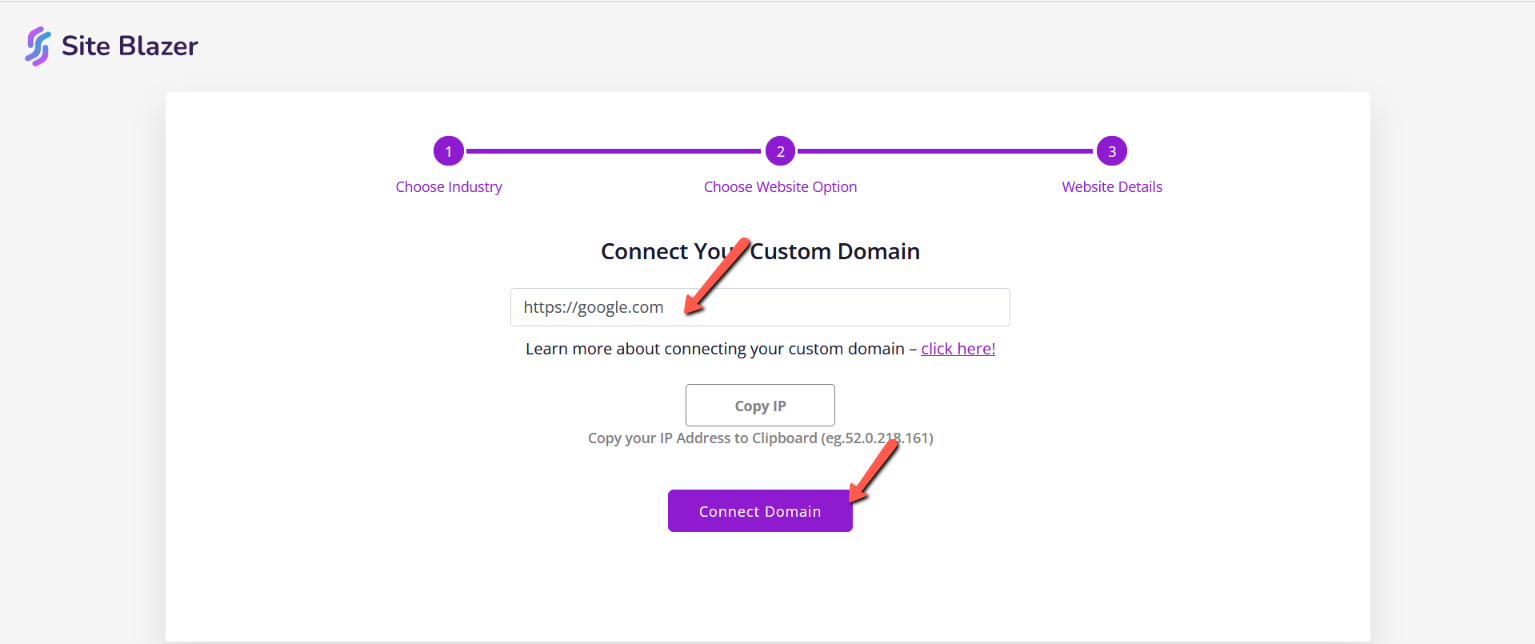
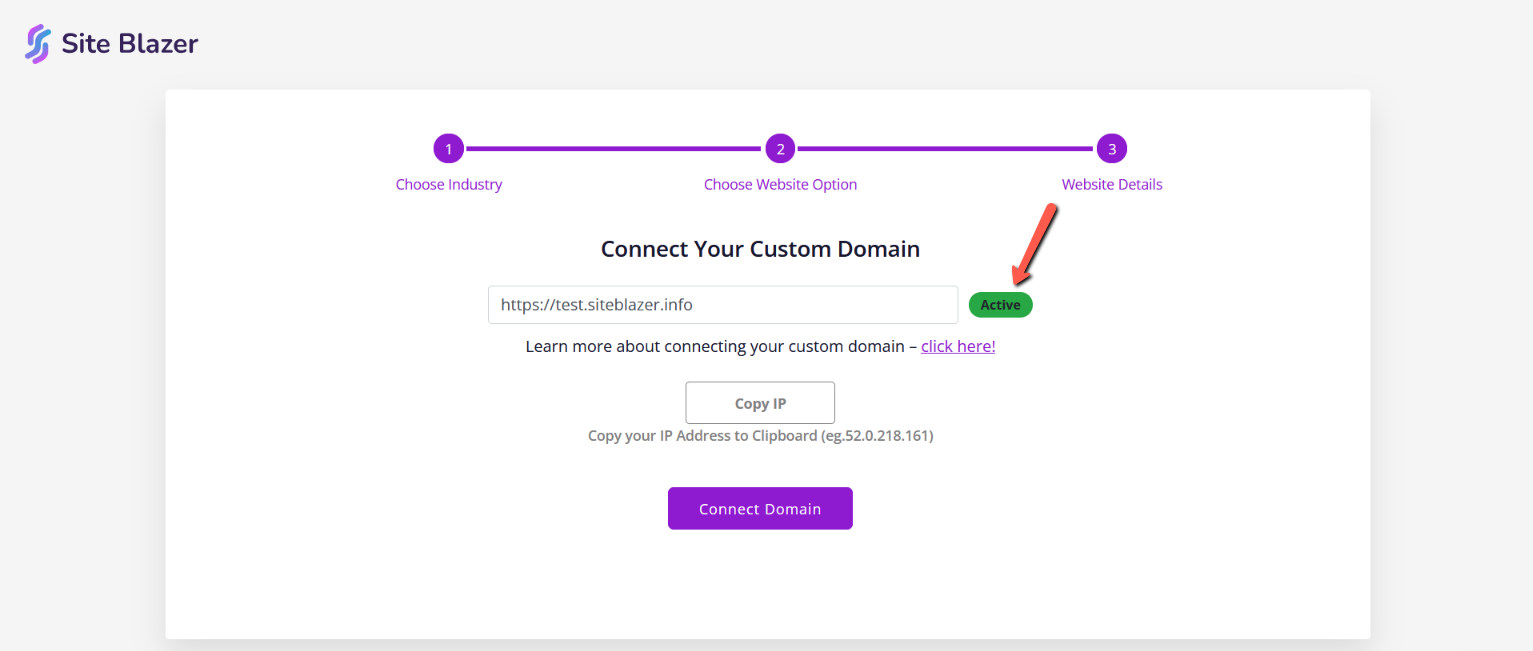
Step 2: Adding the Custom Domain
- Enter your domain URL in the provided field.
- Copy the IP address shown on the screen and paste it into your domain provider’s settings.
- After copying the IP address, click Connect Domain to complete the process.
Step 3: Log In to Your Domain Provider
This is the website where you bought your domain name.
Examples:
- GoDaddy
- Namecheap
- Google Domains
- Cloudflare
Steps:
1. Open your domain provider’s website.
2. Log in to your account.
3. Find DNS Settings or DNS Management.
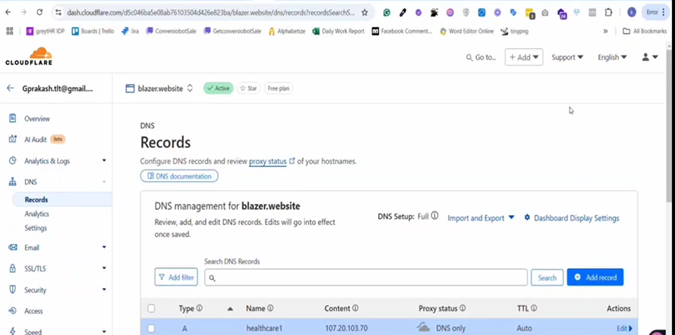
Step 3: Add an A Record
Most domain providers follow similar steps.
1. Go to the DNS section.
2. Click Add Record.
3. Select A Record as the record type.

Step 4: Enter the Details
If you want to connect your main domain
(example: yourdomain.com)
- Name / Host: @
- IP Address / Value: Paste the IP address you copied from SiteBlazer
If you want to connect a subdomain
(example: shop.yourdomain.com)
- Name / Host: shop (or blog, app, etc.)
- IP Address / Value: Paste the same IP address
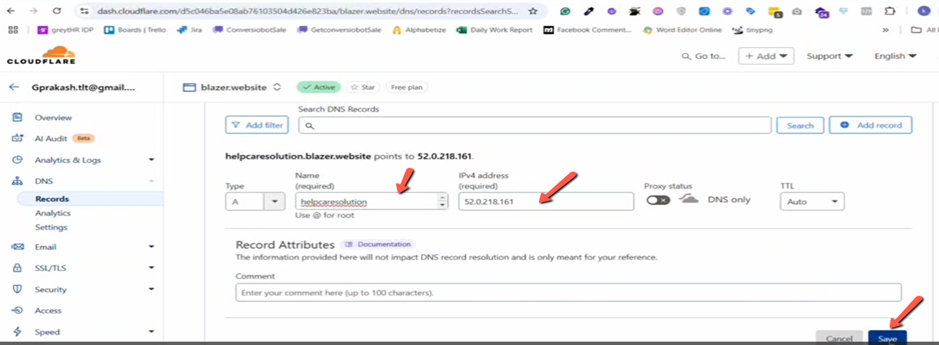
Step 5: Save and Wait
1. Click Save.
2. Wait for the DNS update.
This usually takes:
- A few minutes
- Sometimes up to 24 hours
Step 5:
- Once you add the A Record for your domain, it will be activated automatically in your SiteBlazer dashboard.
Once complete, your website will appear on your domain.

That’s It! Your Website Is Live
Your SiteBlazer website is now connected to your domain.
🎉 You can start sharing your website link and growing your business online!
Need Help?
If you feel confused at any step:
- Visit our Help Centre
- Use Live Chat from your dashboard
Email us anytime — we’re happy to help!!