The first step towards boosting your conversion rates is to add Proof Blazer to your website. Follow these steps to get this done in minutes.
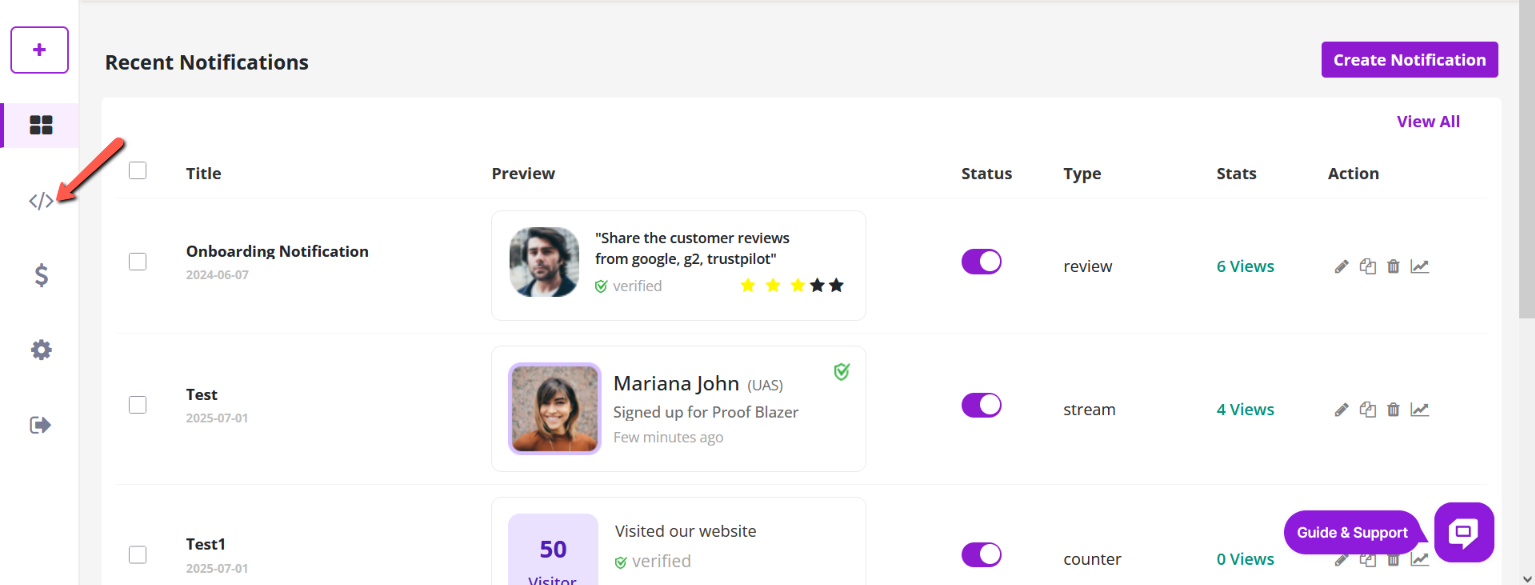
1. Get Your Proof Blazer Code
Choose the Install Code option on your Dashboard.
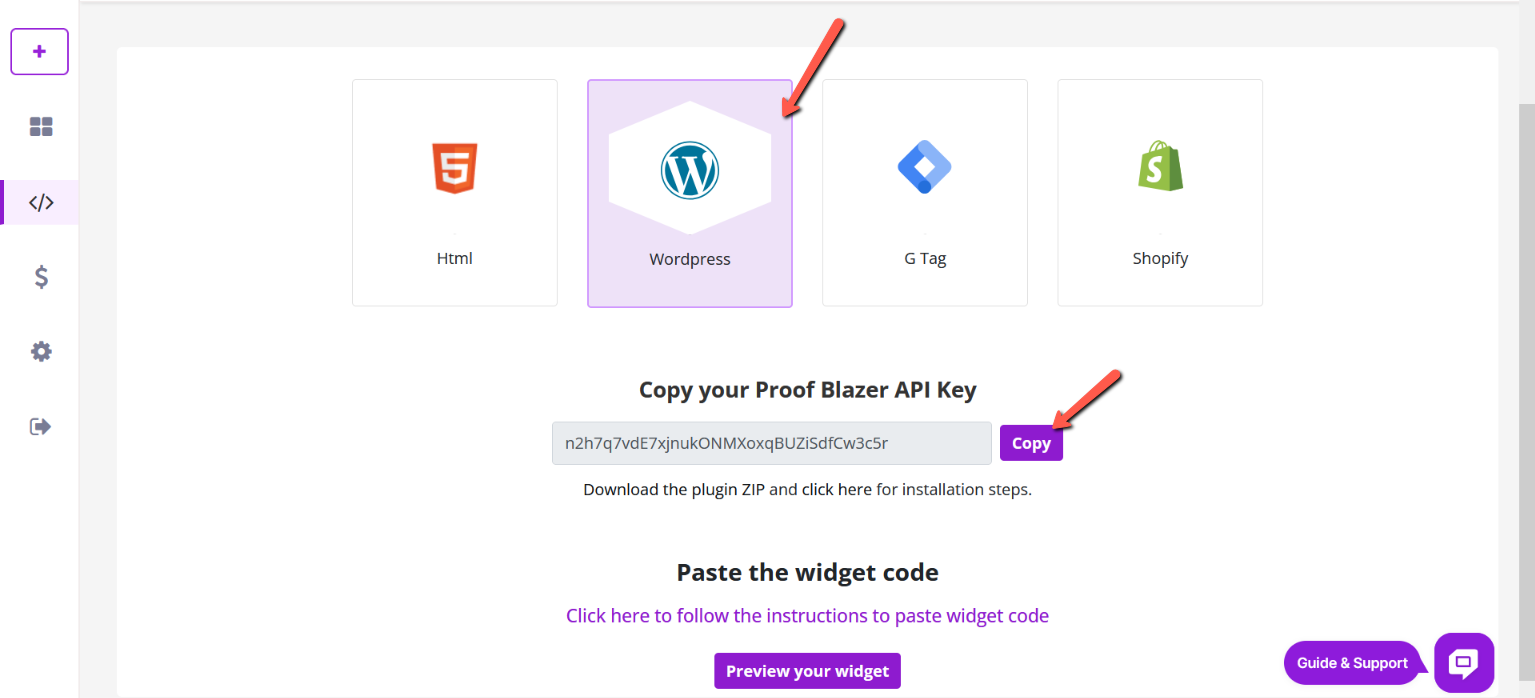
2. Copy & Paste Your Code Into Website Header
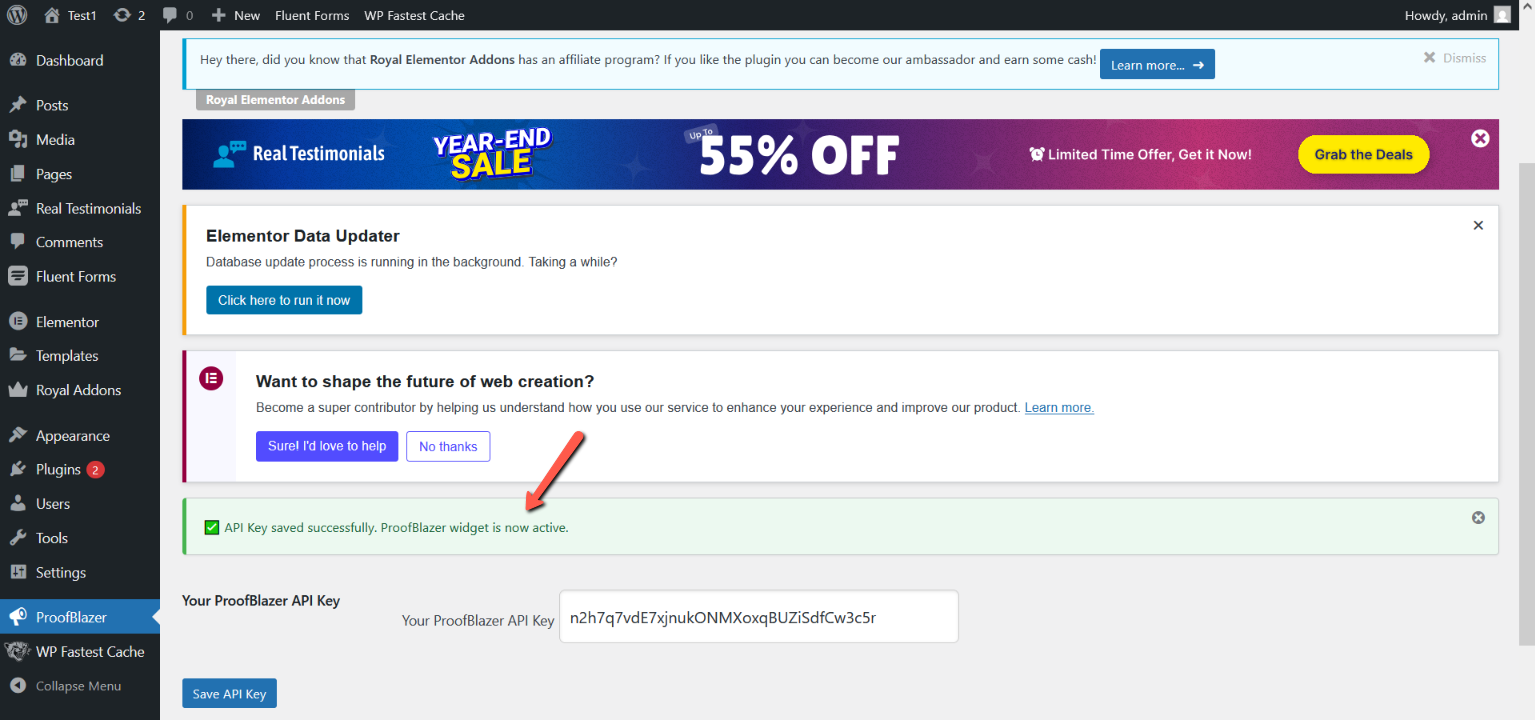
Copy your unique API Key and paste it on your ProofBlazer plugin on every page on your website, landing page (or you can send it to your developer)
Install Proof Blazer Plugin on WordPress
1. Log in to your WordPress Admin Dashboard.
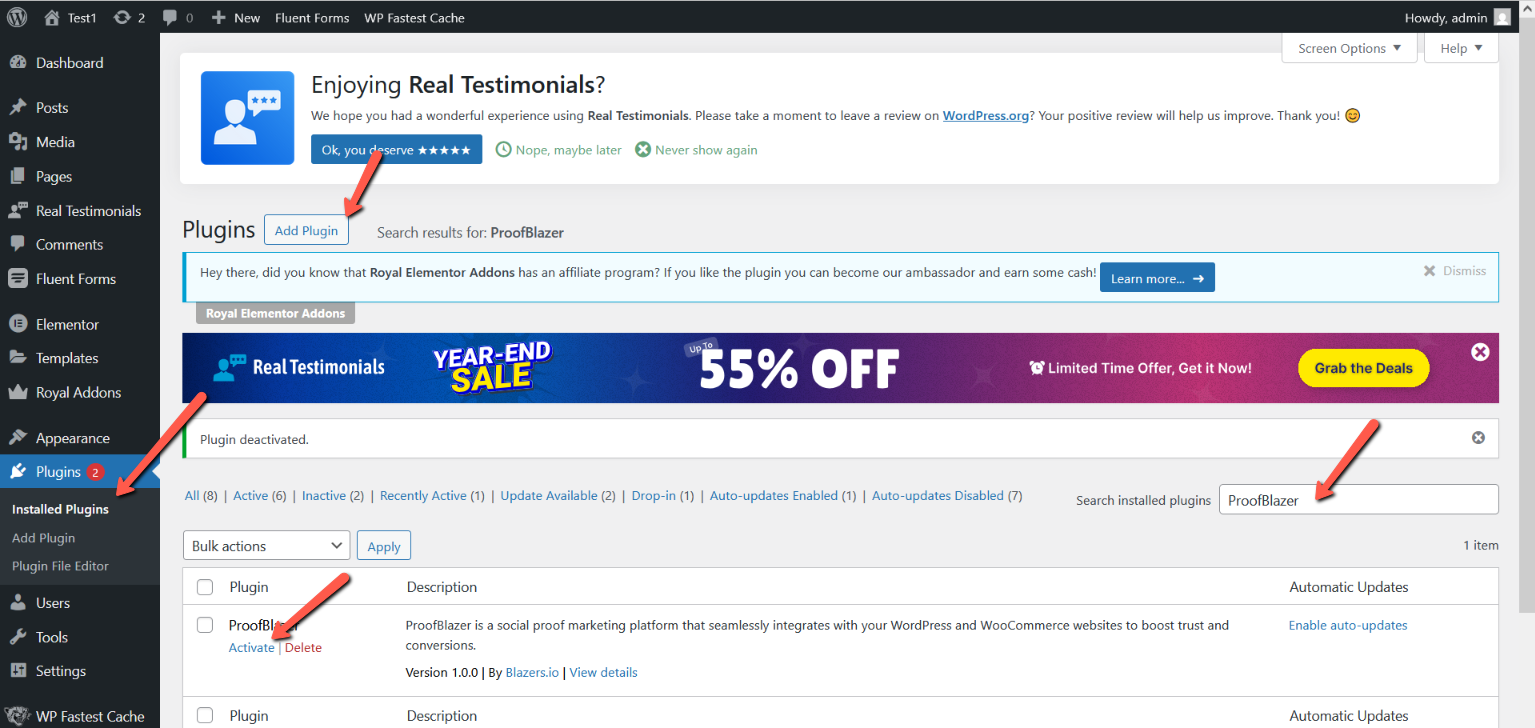
2. On the left side menu, click Plugins.
3. Click Add New.
4. In the search box, type Proof Blazer.
5. When the Proof Blazer plugin appears, click Install.
6. After installation, click Activate.
That’s it! The Proof Blazer plugin is now installed and ready to use on your WordPress website.
Once you've inserted the code, simply scroll to the bottom of the editor and click the Save button to confirm your changes.
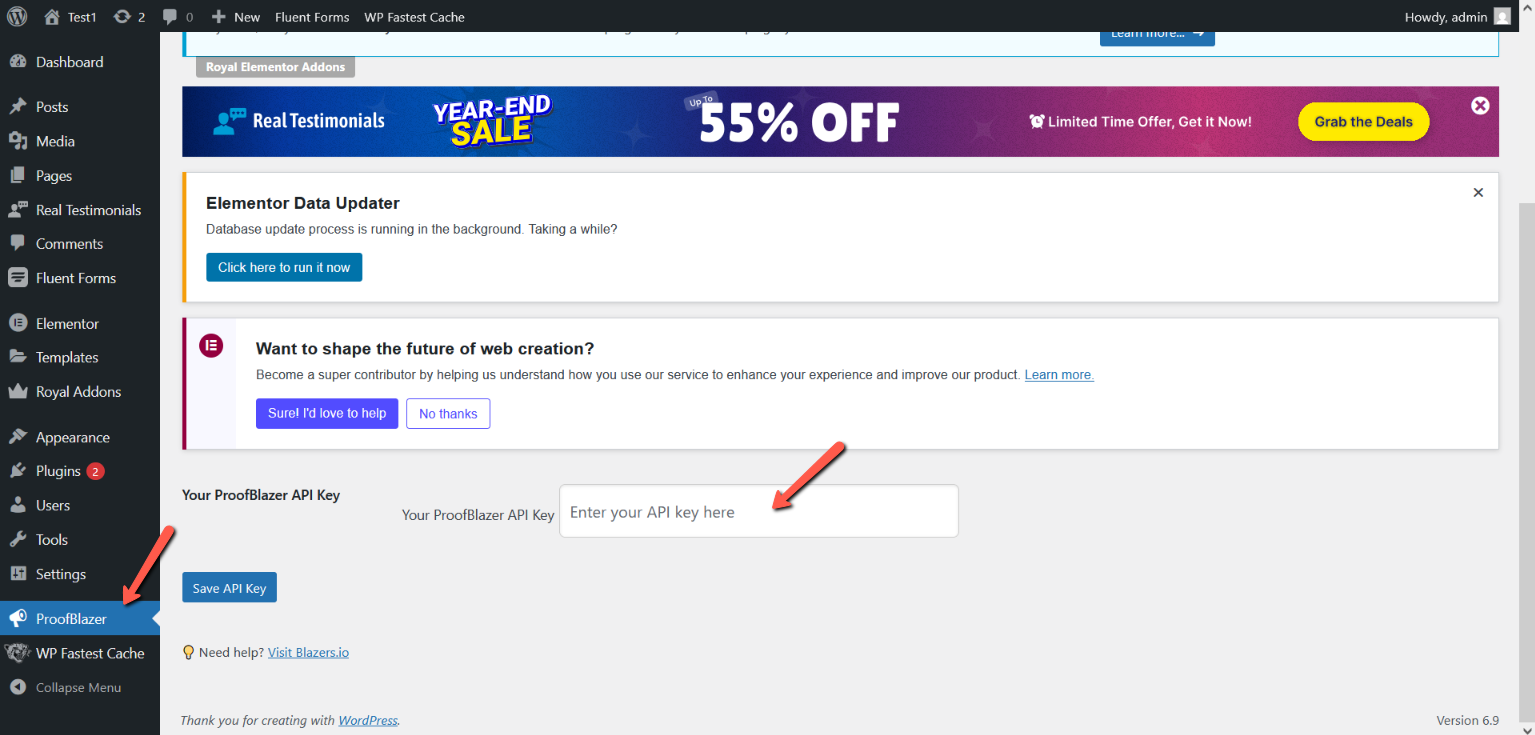
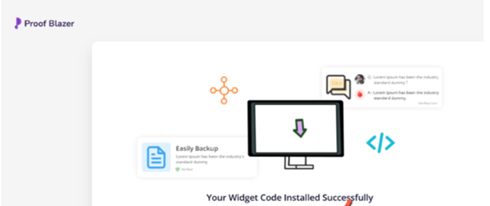
Once the API key is added, your website will be ready to display Proof Blazer campaigns.
The first step towards boosting your conversion rates is to add Proof Blazer to your website. Follow these steps to get this done in minutes.
1. Get Your Proof Blazer Code
Choose the Install Code option on your Dashboard.
2. Copy & Paste Your Code Into Website Header
Copy your unique API Key and paste it on your ProofBlazer plugin on every page on your website, landing page (or you can send it to your developer)
Install Proof Blazer Plugin on WordPress
1. Log in to your WordPress Admin Dashboard.
2. On the left side menu, click Plugins.
3. Click Add New.
4. In the search box, type Proof Blazer.
5. When the Proof Blazer plugin appears, click Install.
6. After installation, click Activate.
That’s it! The Proof Blazer plugin is now installed and ready to use on your WordPress website.
Once you've inserted the code, simply scroll to the bottom of the editor and click the Save button to confirm your changes.
Once the API key is added, your website will be ready to display Proof Blazer campaigns.