Welcome to WPBlazer!
This article shows you how to install the WPBlazer plugin on your WordPress site (or sites). There are plenty of options. Choose the installation method that works best for you.
Getting started
- Go to https://wp.blazers.io/
- Sign up for a 14-day free trial account. (no credit card required)
- Click the Take A Tour button.
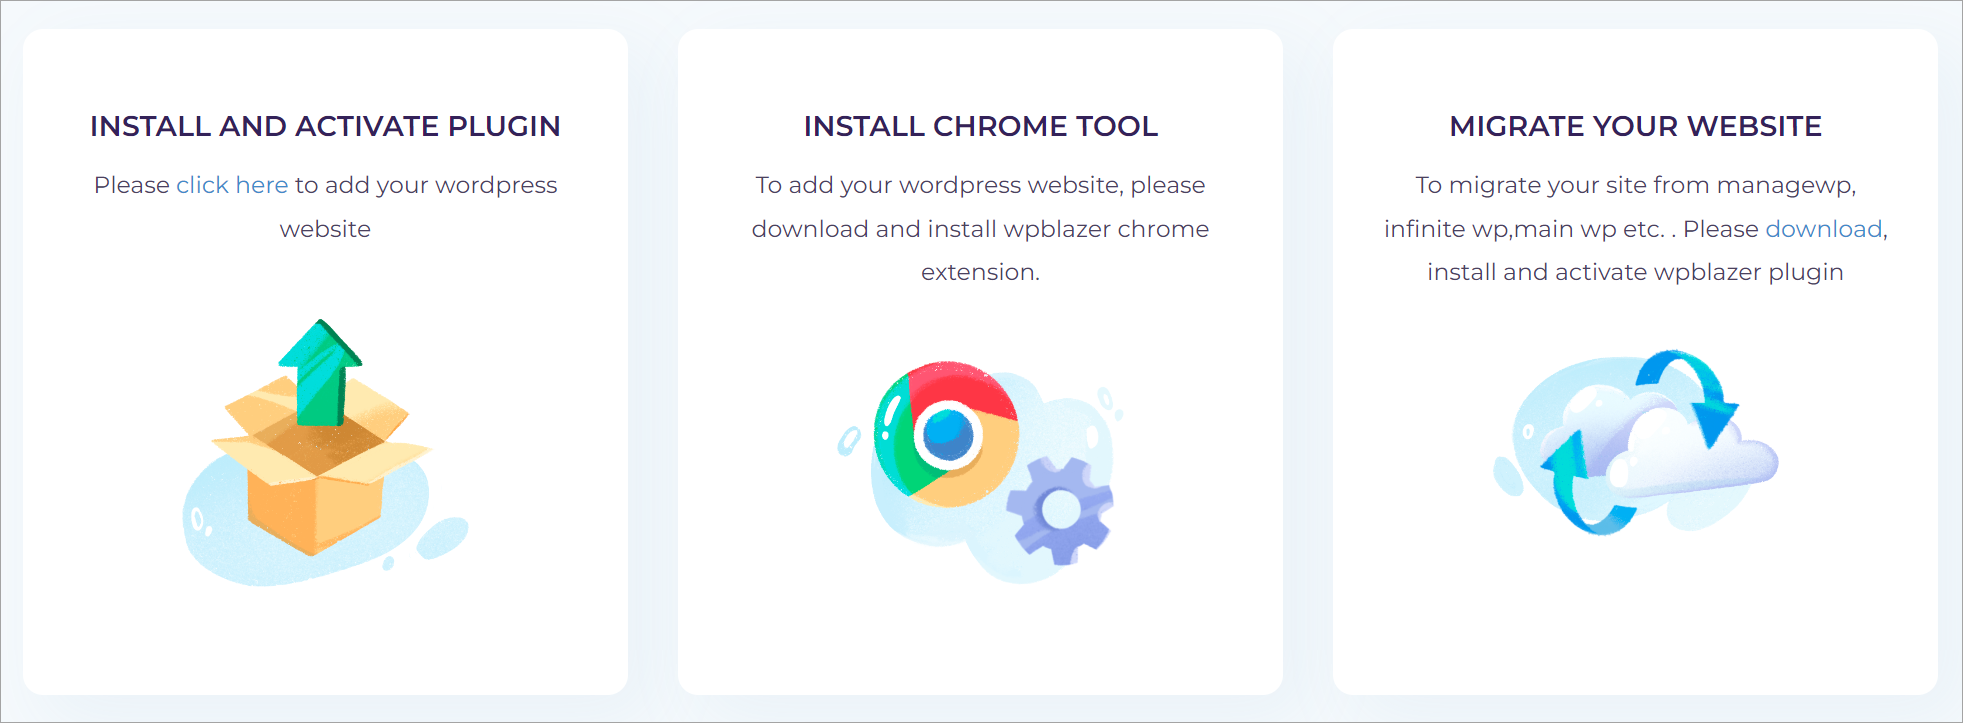
On the next page, choose one installation method.
Install and activate the plugin
A good choice if you have a few sites and are familiar with the WordPress plugin installation process.
Install Chrome tool
Save time if you want to install WPBlazer on multiple sites.
Migrate your website
The best option if you’re moving sites to WPBlazer from a different WordPress site manager.
Install and activate the plugin
There are options. Choose one.
- Manual
- Auto Installation
- Bulk
Manual Installation
If you’re familiar with WordPress plugins and zip files, this is the standard download-upload method.
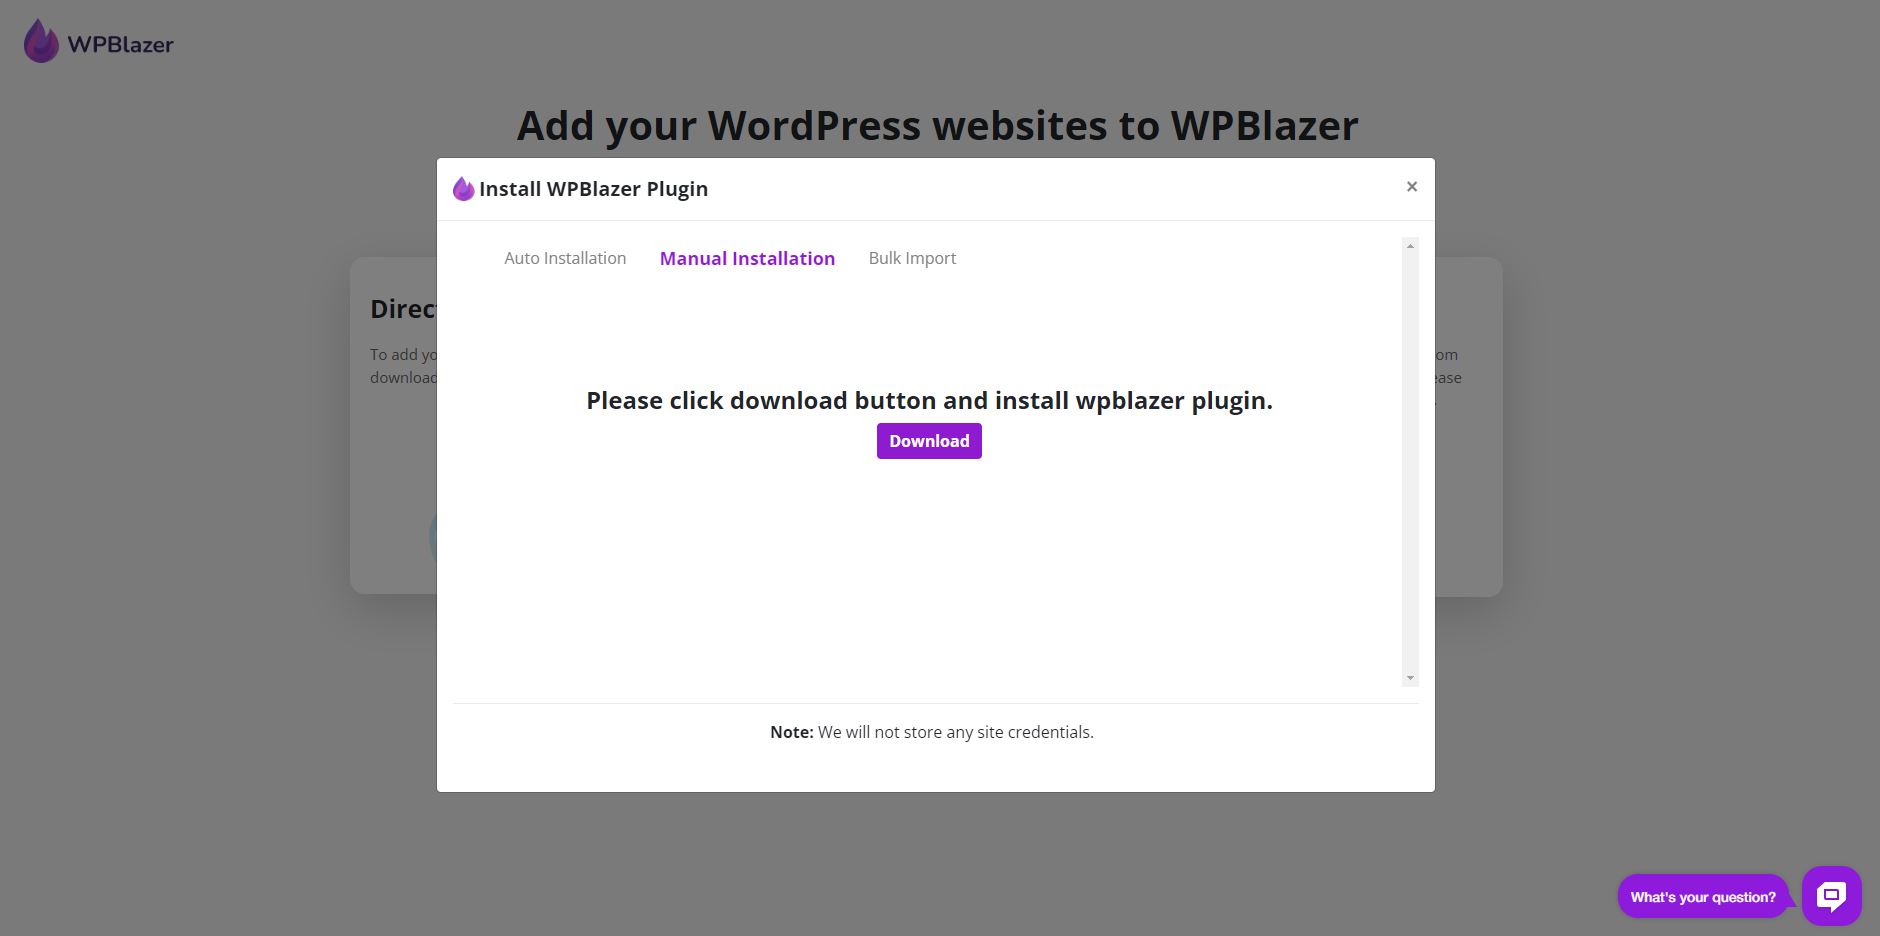
- Click the Manual Installation tab.
- Click the Download button. WPBlazer saves the zip file to your device.
- Move the zip file to a convenient location so that it’s easy to find.
Adding the plugin
- Go to your WordPress site admin dashboard.
- On the side menu, click Plugins > Add New.
- Click Upload Plugin > Choose file and then locate the zip file on your device.
- Click Install Now.
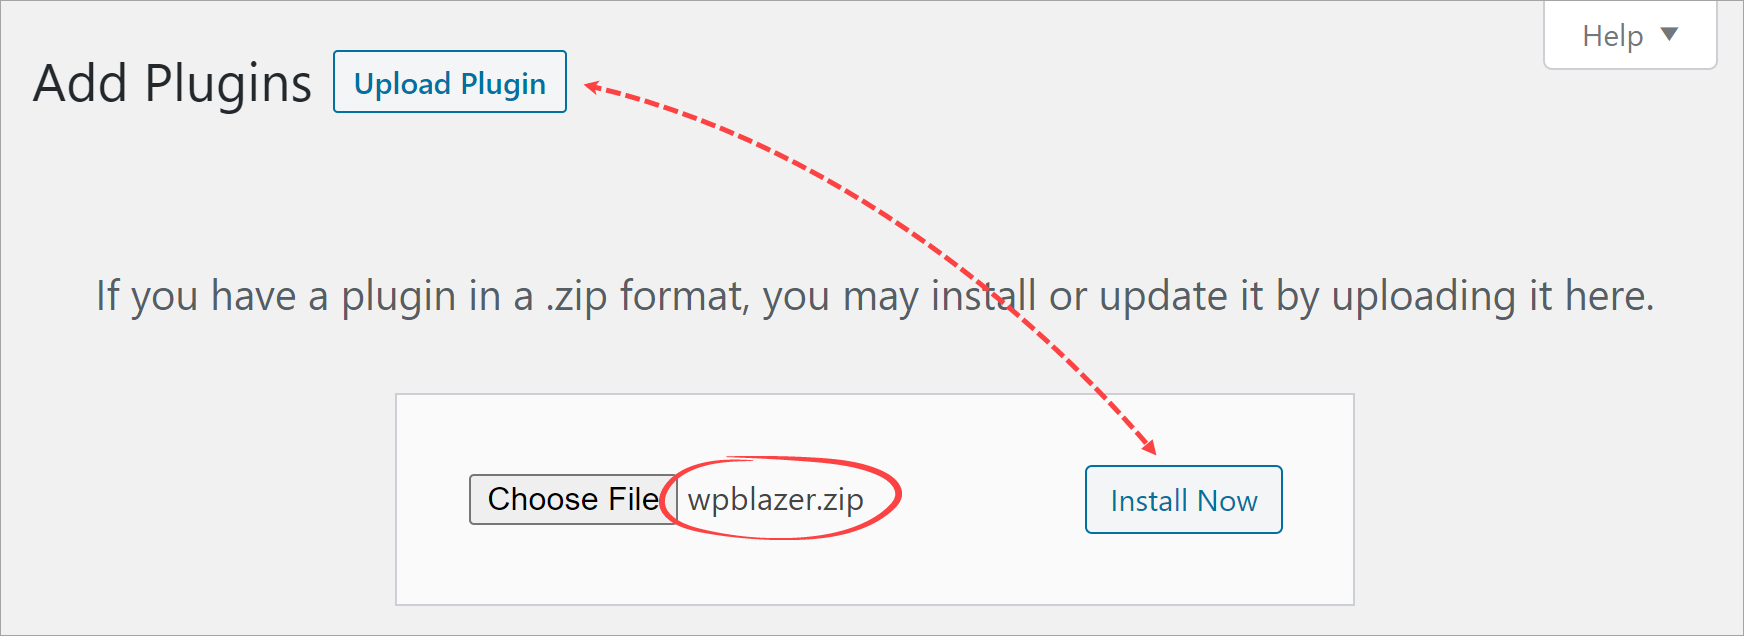
- After activating the app, WPBlazer displays on the side menu.

Possible error message
You might experience an upload error message. Depending on the type of hosting service you have and the provider, you might be able to fix the problem. Google this phrase, and you’ll find plenty of solutions. They usually involve editing the htaccess file or php.ini file. This short video provides some useful tips. You could contact your hosting company and ask them to increase the file size limit.

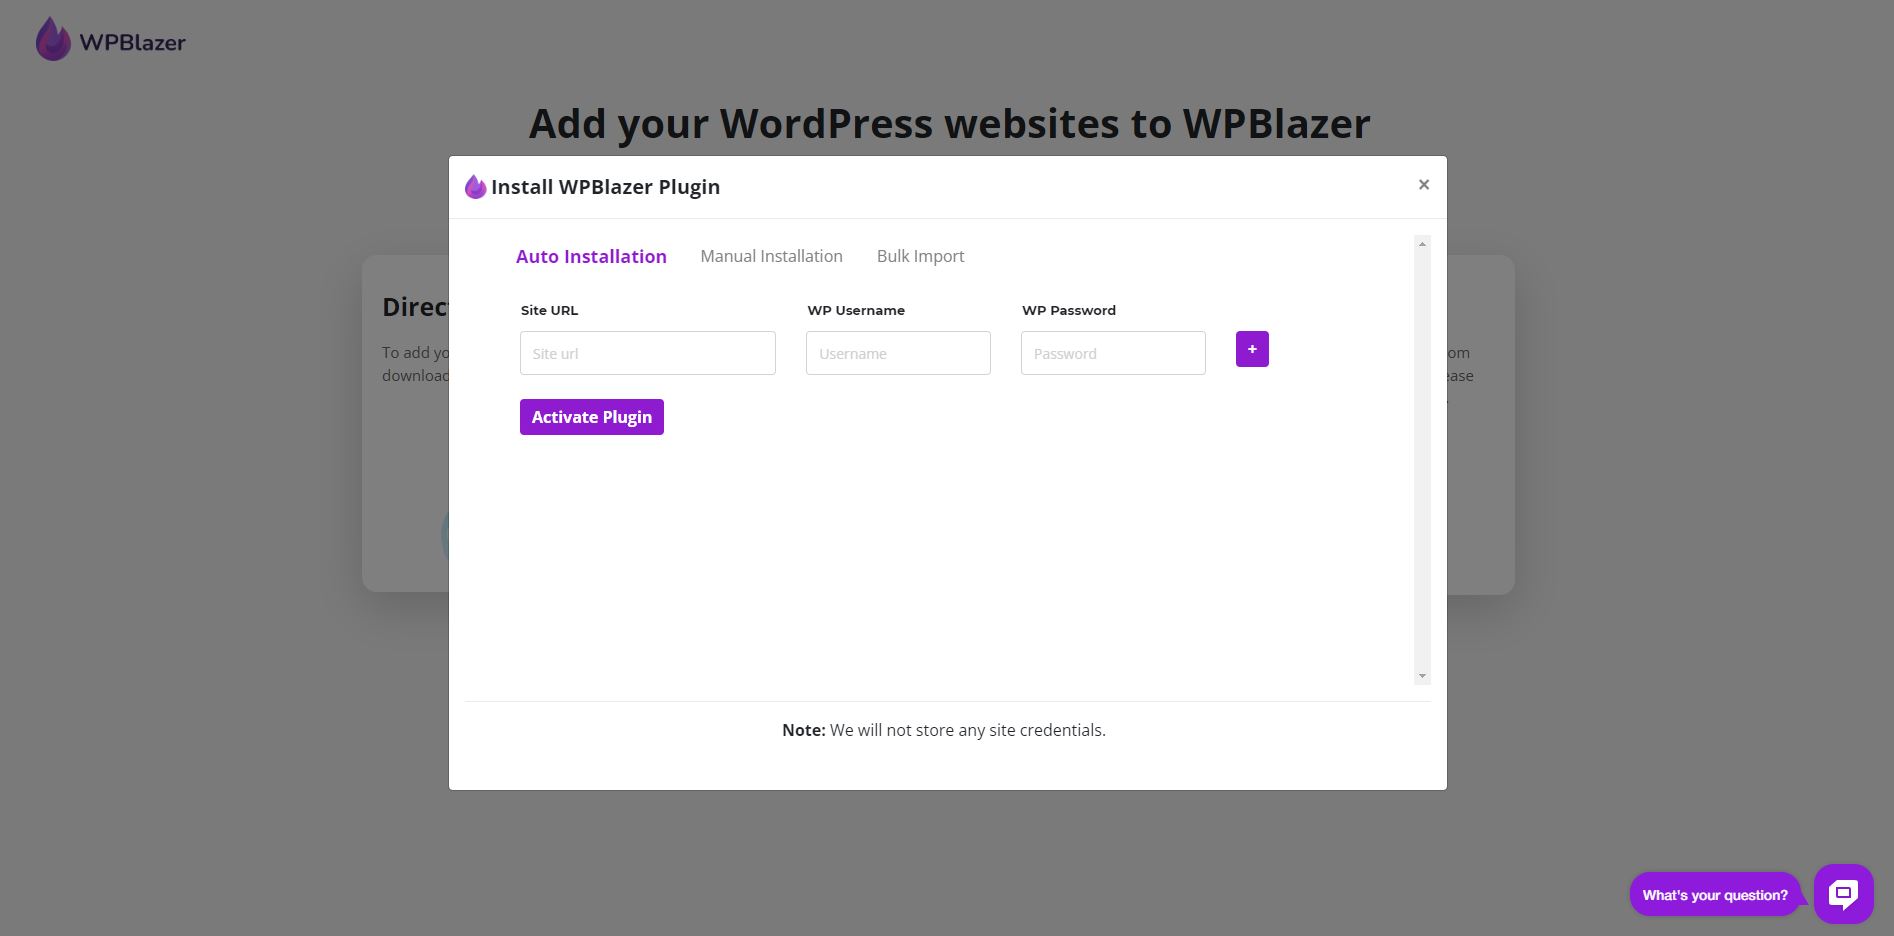
Auto Installation
If you prefer an easier solution, click the Auto Installation tab. Enter the URL for your WordPress site (include http:// or https://) and the username and password. Click Activate Plugin, and we’ll take care of the rest.
Installation takes a few minutes to complete.
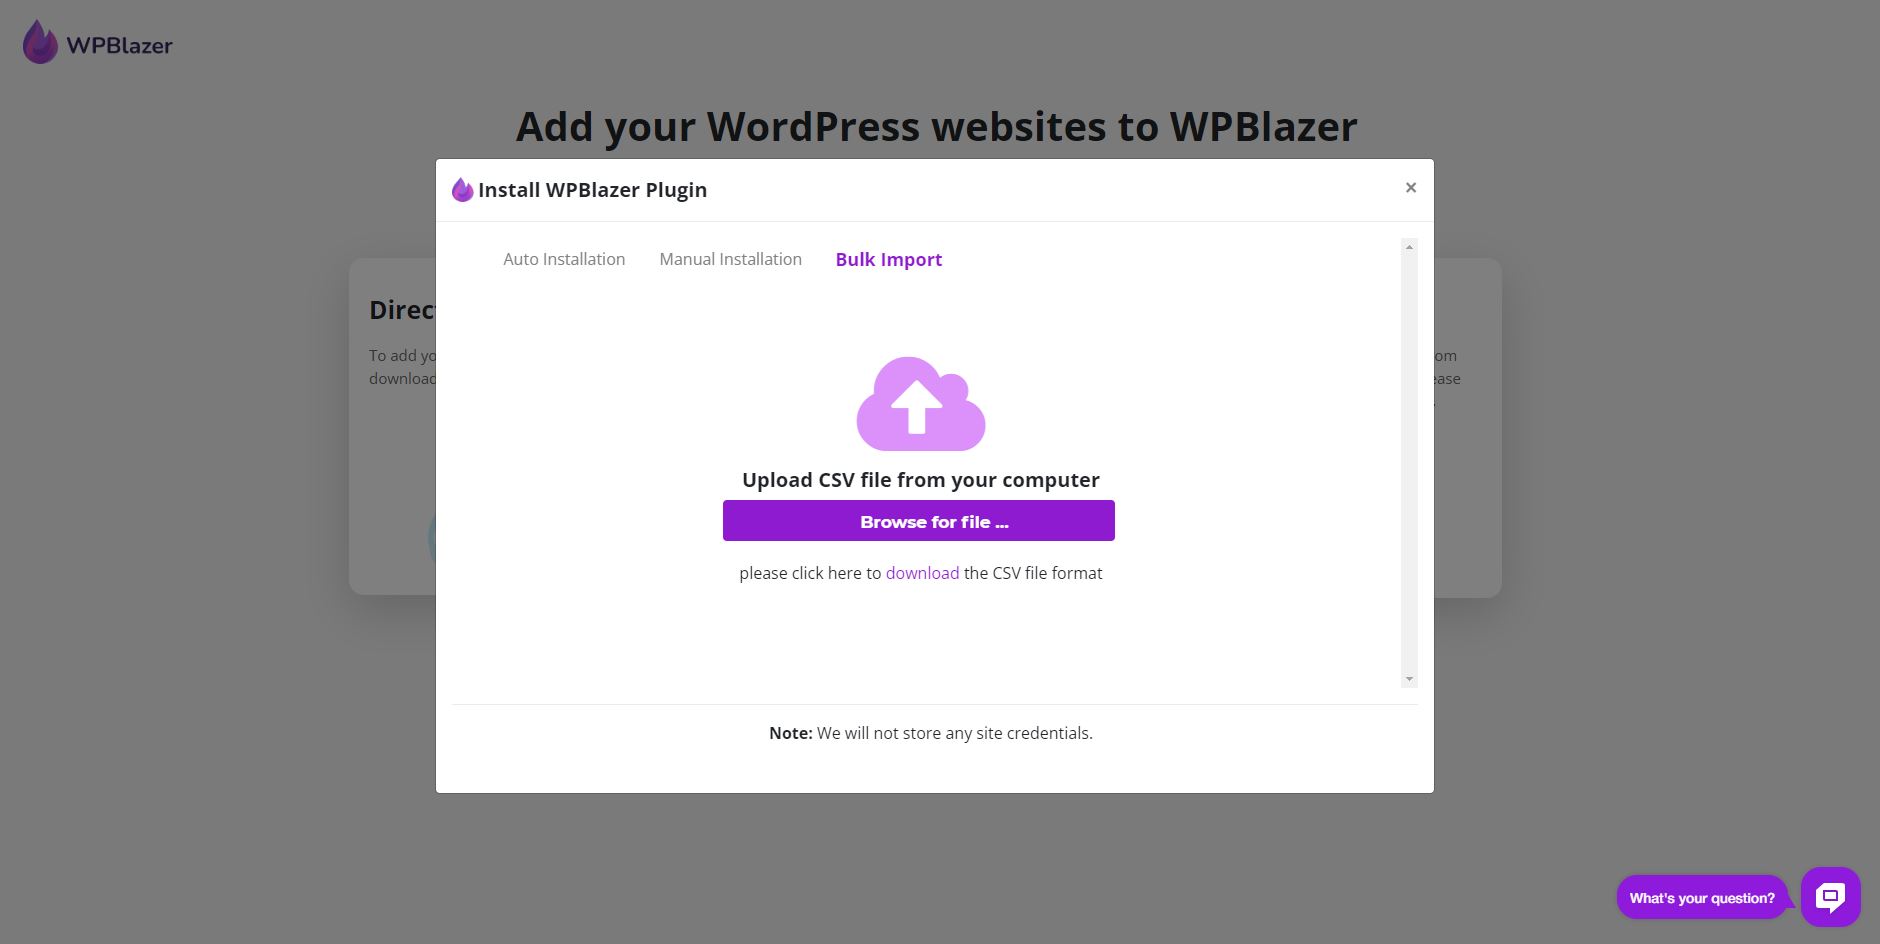
Bulk Import
Do you have a lot of WordPress sites? Save time and let us do the installation. Here’s how.
- Click the Bulk Import tab.
- Download the CSV template. (see below)
- Add web information to the file.
- Upload the file.
That’s it.
We usually complete bulk installation in 2-3 business days. Sometimes sooner.
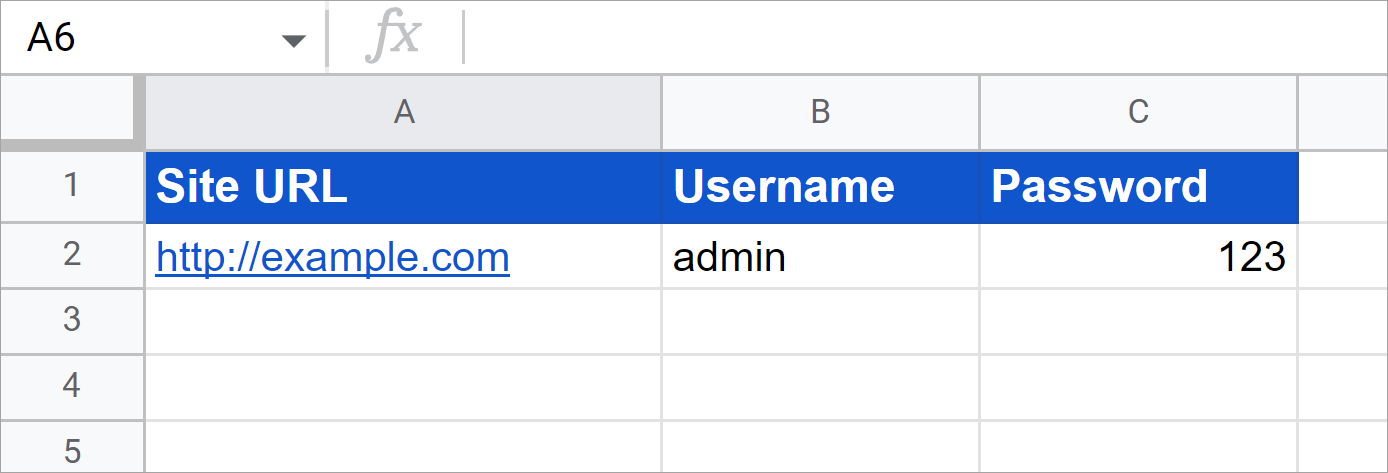
CSV template
Open the Google sheet and make a copy. Save the new file on your Google drive. For each website, enter the URL, username, and password.
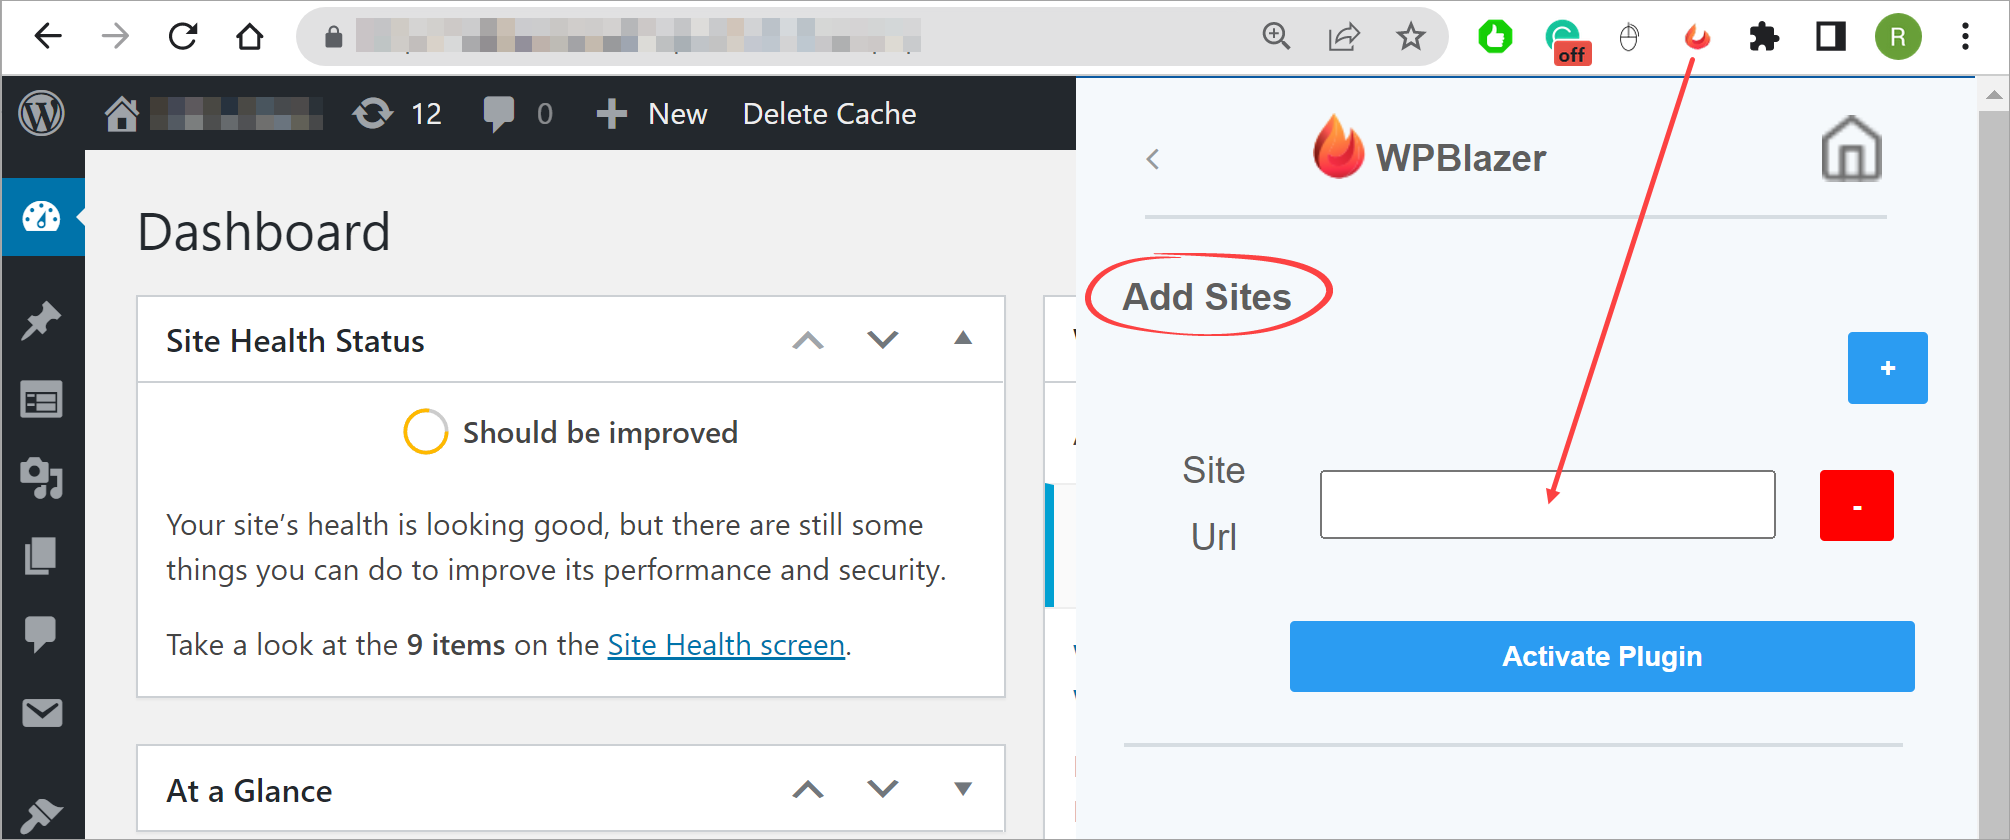
Install Chrome tool
If you want to install WPBlazer on multiple sites and you run Chrome on your device, this option can save a bit of time. With the extension, you don’t need to download or upload the zip file. You can add sites one at a time or use the bulk import tool.
- Click the Install Chrome tool tile.
- On the Chrome web store page, click Add to Chrome.
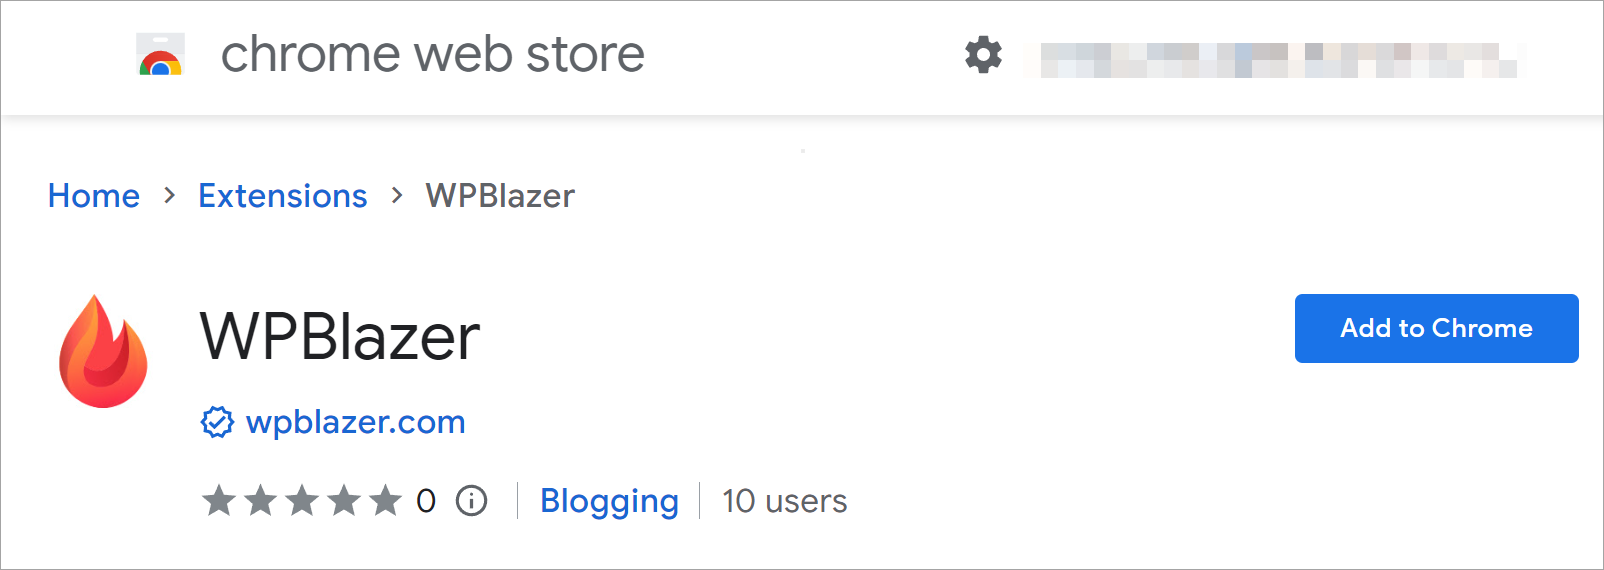
- Chrome adds the WPBlazer icon to the toolbar.

Installing the plugin
- Open a WordPress site.
- Go to the Admin dashboard.
- Click the WPBlazer extension icon. A popup window displays.
- Click Add Site.
- Enter the website URL into the field. Include http:// or https://.
- Click Activate plugin.
- Click Add in the confirmation popup window.
- WPBlazer automatically uploads and installs the plugin.
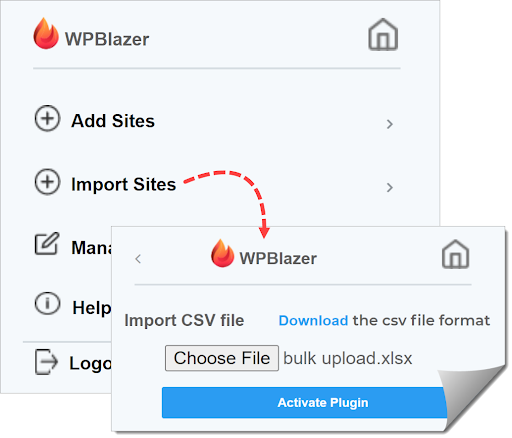
Import sites
This feature works just like the Bulk Import tool described above. You upload a CSV file with site names and credentials, and we do all installation work.
- Open the extension and click Import Sites.
- Upload a CSV file with a list of your sites plus log in credentials (username and password).
- Click Activate Plugin.
That’s it!
Migrating Your Website
Choose this all-in-one solution to quickly and easily move multiple sites from a different WordPress site manager to WPBlazer.
Click the download link on the MIGRATE YOUR WEBSITE tile. Save the zip file in a convenient location because you need it to complete the next step.
The migrations steps are a bit different for each WordPress site manager site. We created instructions for three sites:
- ManageWP
- BlogVault
- InfiniteWP
- MainWP
Migrating from ManageWP
Follow these steps to migrate your sites from ManageWP to WPBlazer. First, log in to your ManageWP account and then:
- Click Websites on the side menu.
- Check the box for each site that you want to migrate to WPBlazer.
- Click the Plugins menu tab.
- On the next page, click the Add plugin button.

On the next page:
- Click the URL & ZIP menu tab.
- Click the Install from a .ZIP file tile.
- Upload the WPBlazer zip file from your device.
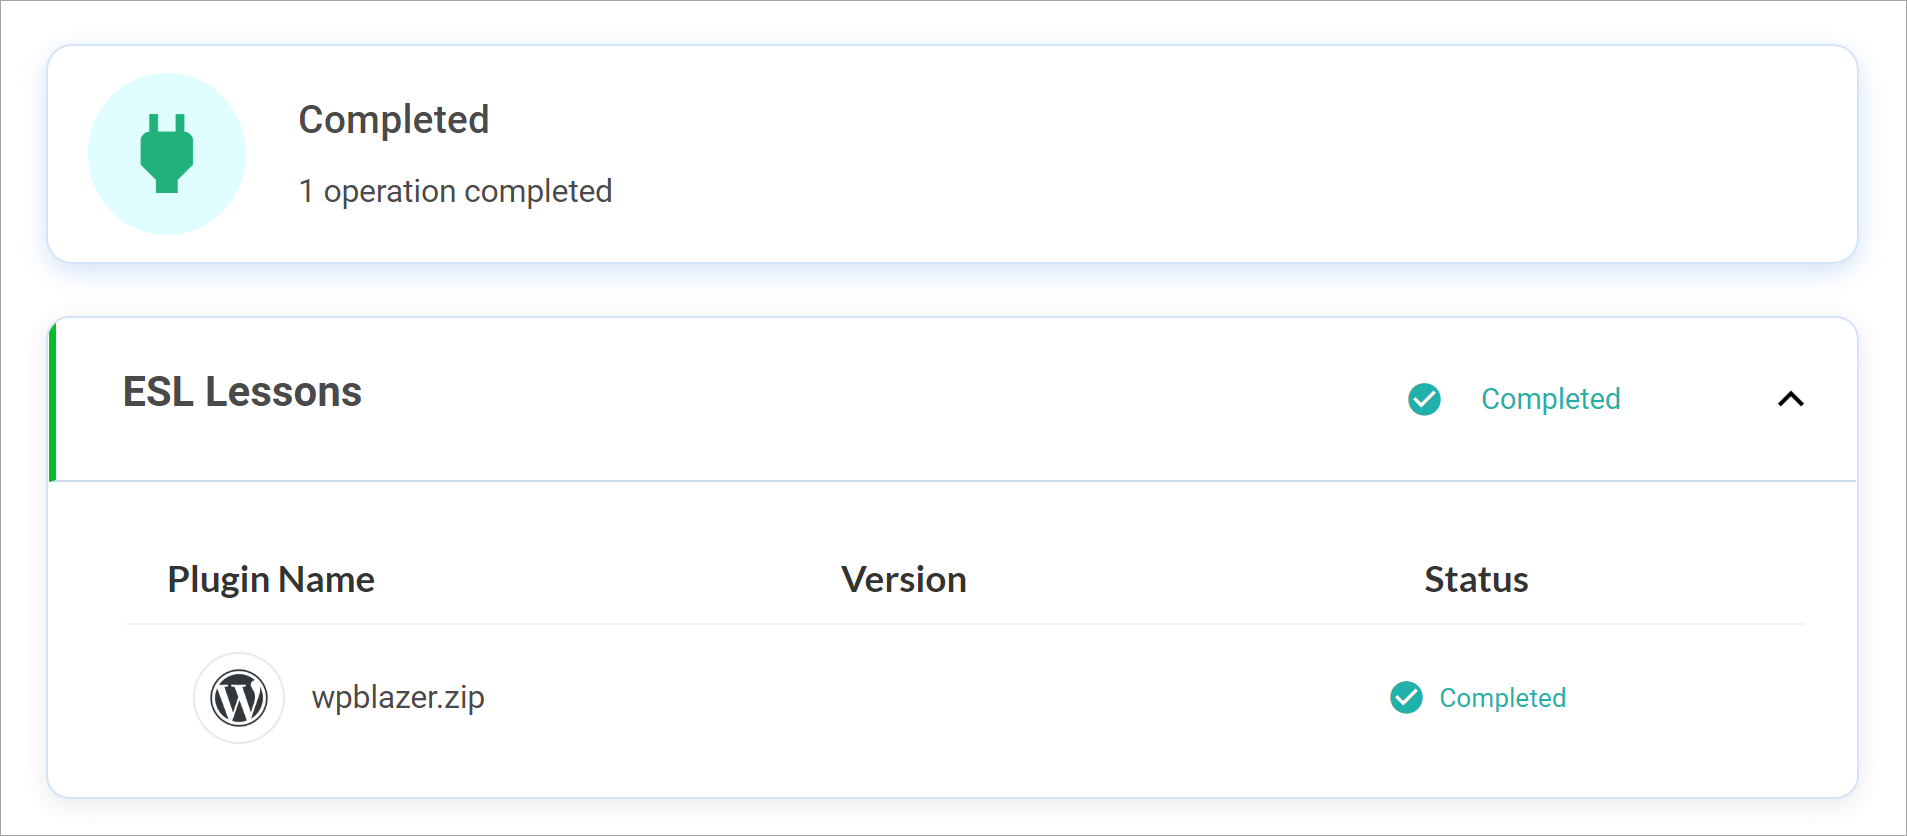
ManageWP automatically uploads the WPBlazer plugin and installs it on each selected WordPress site.

Migrating from BlogVault
Follow these steps to migrate your sites from BlogVault to WPBlazer. First, log in to your BlogVault account and then:
- Click the Sites menu tab.
- Check the box for each site that you want to migrate to WPBlazer.
- Click the MANAGE field.
- Select Manage Plugins on the drop-down menu.
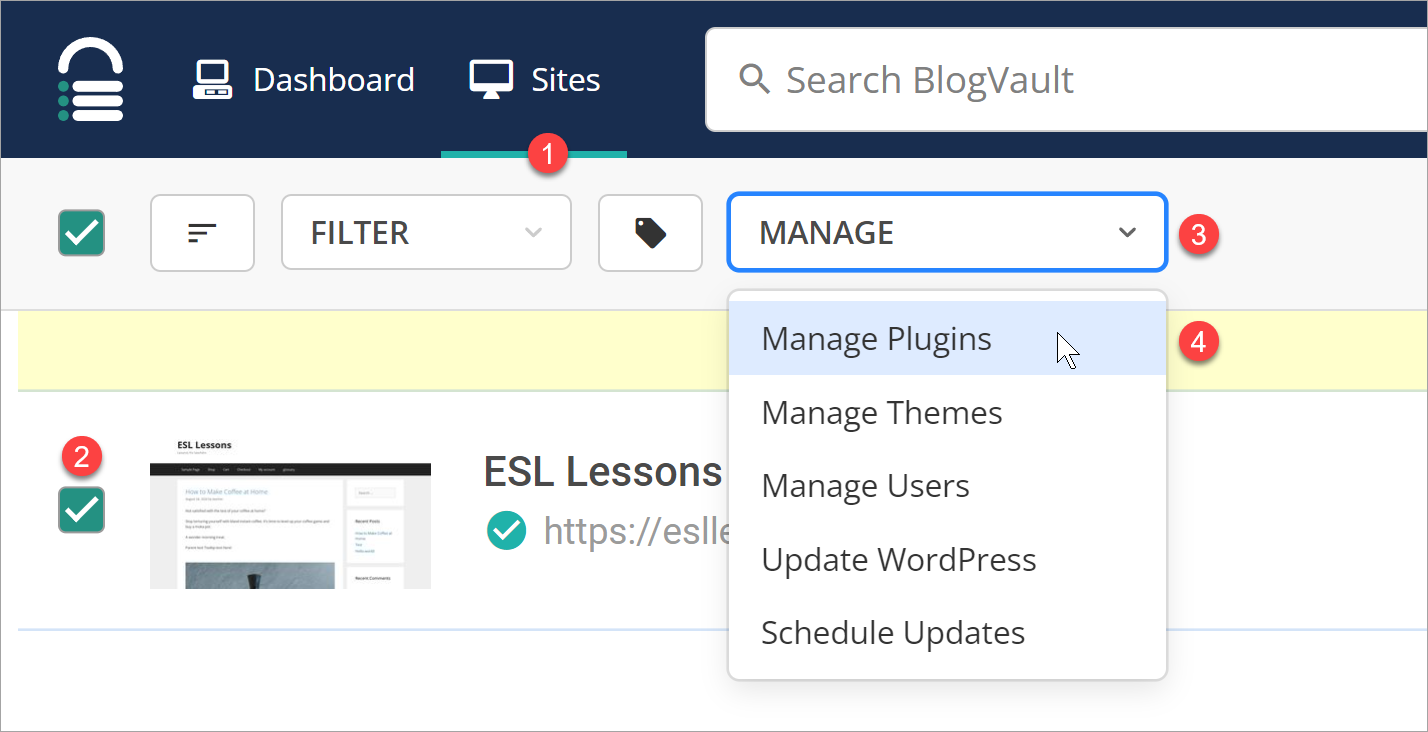
On the next page:
- Click the ADD NEW button.
- On the next page, click Upload plugins.
- Click Select File and locate the WPBlazer zip file on your device.
- Click Install and then Confirm on the popup window.
BlogVault automatically uploads the WPBlazer plugin and installs it on each selected WordPress site.
Final Step
We showed you many installation options in this article.
After you install the plugin, WPBlazer returns to the setup dashboard. If the dashboard does not move automatically, click # 3 to complete the installation and explore WPBlazer features.
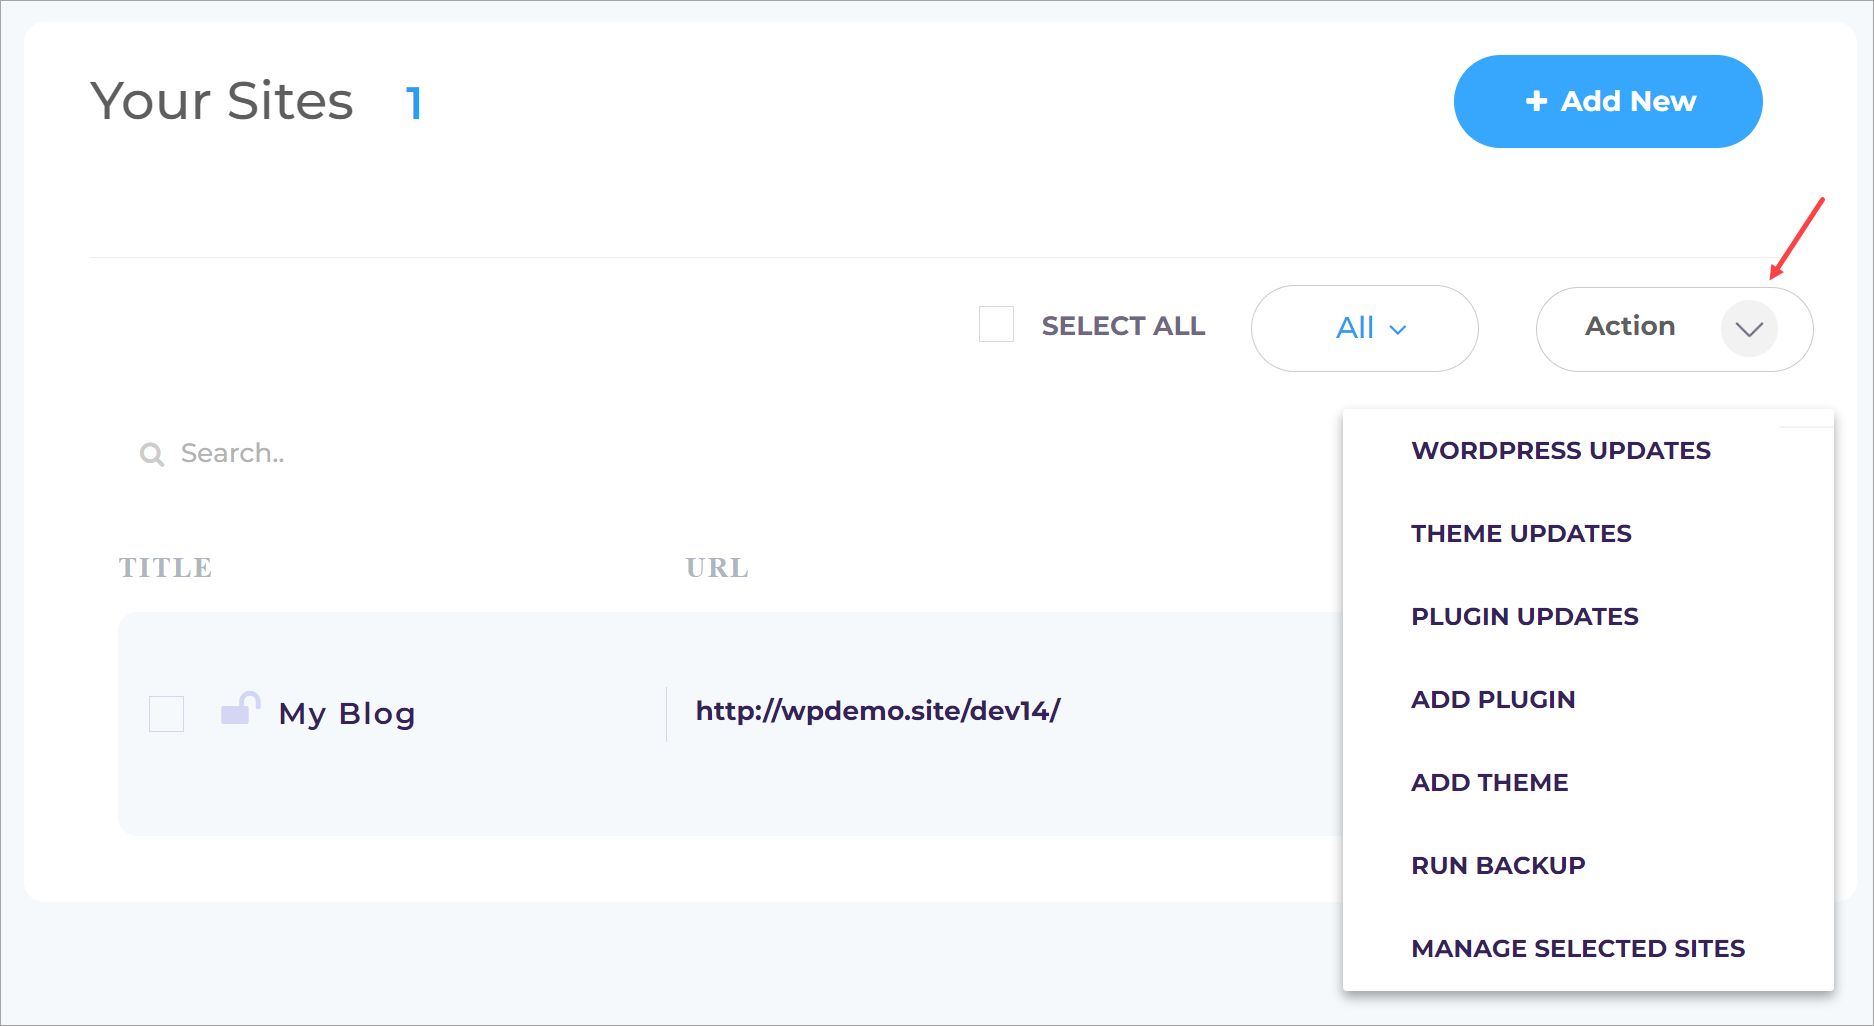
On the MyApp dashboard, you can:
- See a list of current sites.
- Add a new site to the platform.
- Click Action to access a wide range of platform tools.