This article shows you how to deactivate a plugin on a single site or multiple sites at the same time. When you deactivate a plugin, the software continues to sit on your site -- a kind of sleep mode -- but its features are not working. You can re-activate the plugin any time at a later date if you wish.
Getting ready
Before deactivating a plugin, you need to know how to select a site or sites. For more information, read:
Deactivating a plugin on a single site
Select the site you want to update and then click the Dashboard icon. A new page displays.
On the left menu, hover the mouse on the WordPress icon and then click Plugins. A new page displays.

On the new page, locate the plugin that you want to deactivate.
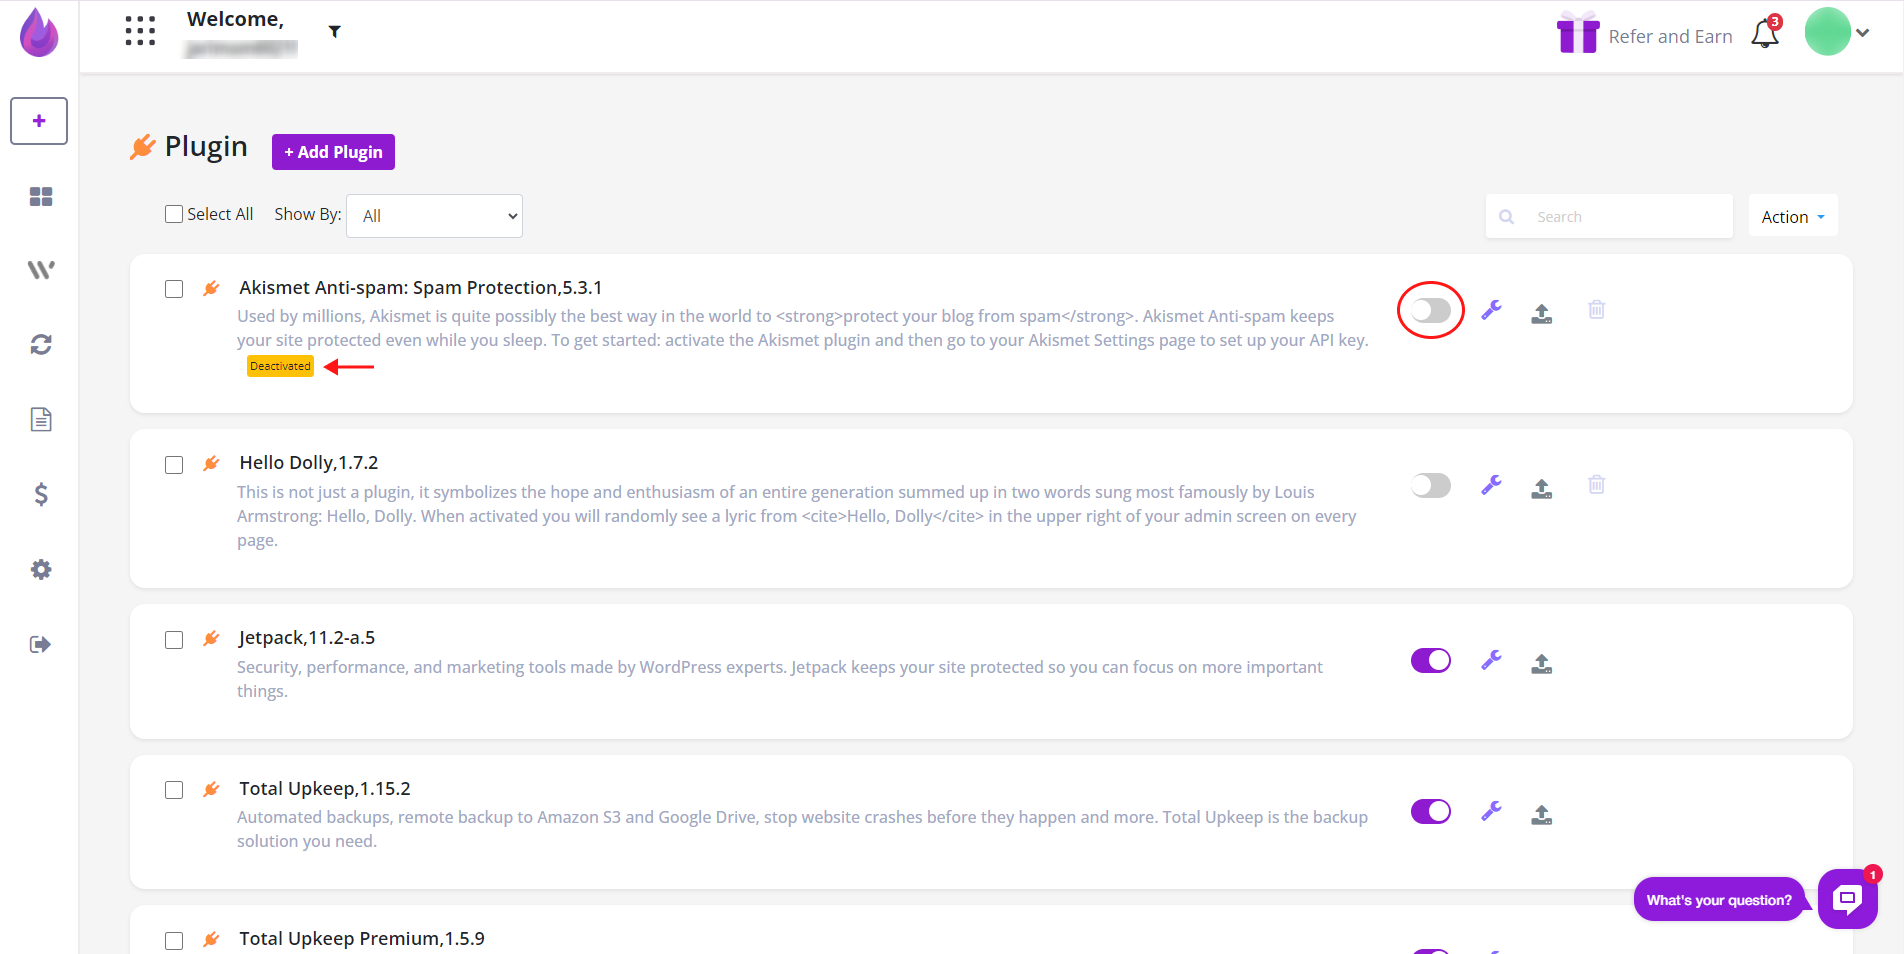
Click the toggle switch to the OFF position (Purple) to deactivate the plugin.

Deactivating a plugin on multiple sites
Open the dashboard Page. On the left menu, hover the mouse on the WordPress icon and then click Plugins. A new page displays.

On the new page, scroll down the list and click the plugin (or plugins) you want to deactivate. A drop-down menu shows site names.

To deactivate a plugin on multiple sites, you have two options.
The first option is to click the toggle switches to the OFF position.
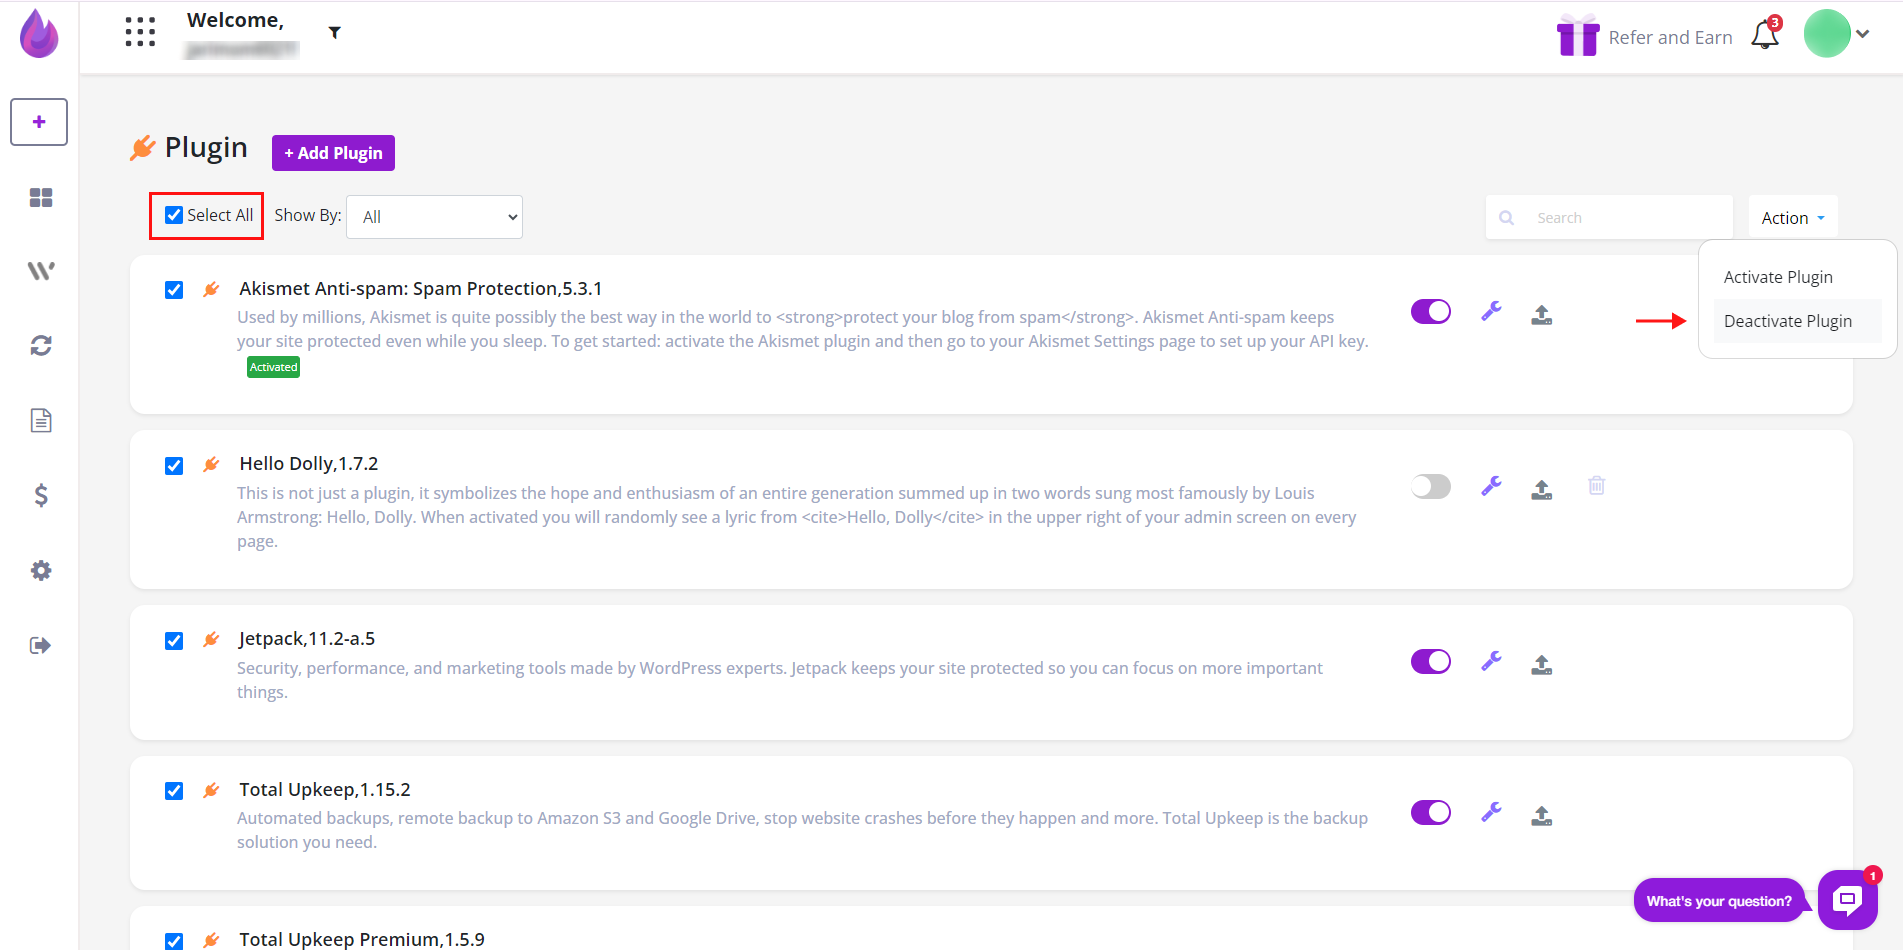
The second option is to click the checkboxes beside each site name.
Next, scroll up to the top of the page. Click the Action button, and then select Deactivate Plugin.
The plugins are now inactive.